BOOTMARK Help Center

Your complete guide to running your business on BOOTMARK — and how it works for your clients.

What is BOOTMARK?

BOOTMARK is an all-in-one field-service management platform for service businesses — landscaping, HVAC, plumbing, cleaning, carpentry, and more. It runs the whole operation in one place: clients, quotes, jobs, scheduling and dispatch, crew tracking, invoicing, online payments, contracts, forms, inventory, reporting, and automation. It also gives each business's own customers a self-service portal and a public marketplace (BOOTMARK Connect) to find a provider, request work, track the crew, sign documents, and pay online.

How BOOTMARK works

How a service business runs its whole operation on BOOTMARK, end to end.

1

Sign up and get approved

Create an account with email and password (or Google) and complete a short two-step registration: your company basics (name, business type, currency, address) and the service categories you offer. BOOTMARK gives you a unique web address and makes you the Owner. New businesses start in a pending-review state; once a BOOTMARK admin approves it you go live on the Free plan and get an approval email.

2

Set up your workspace and team

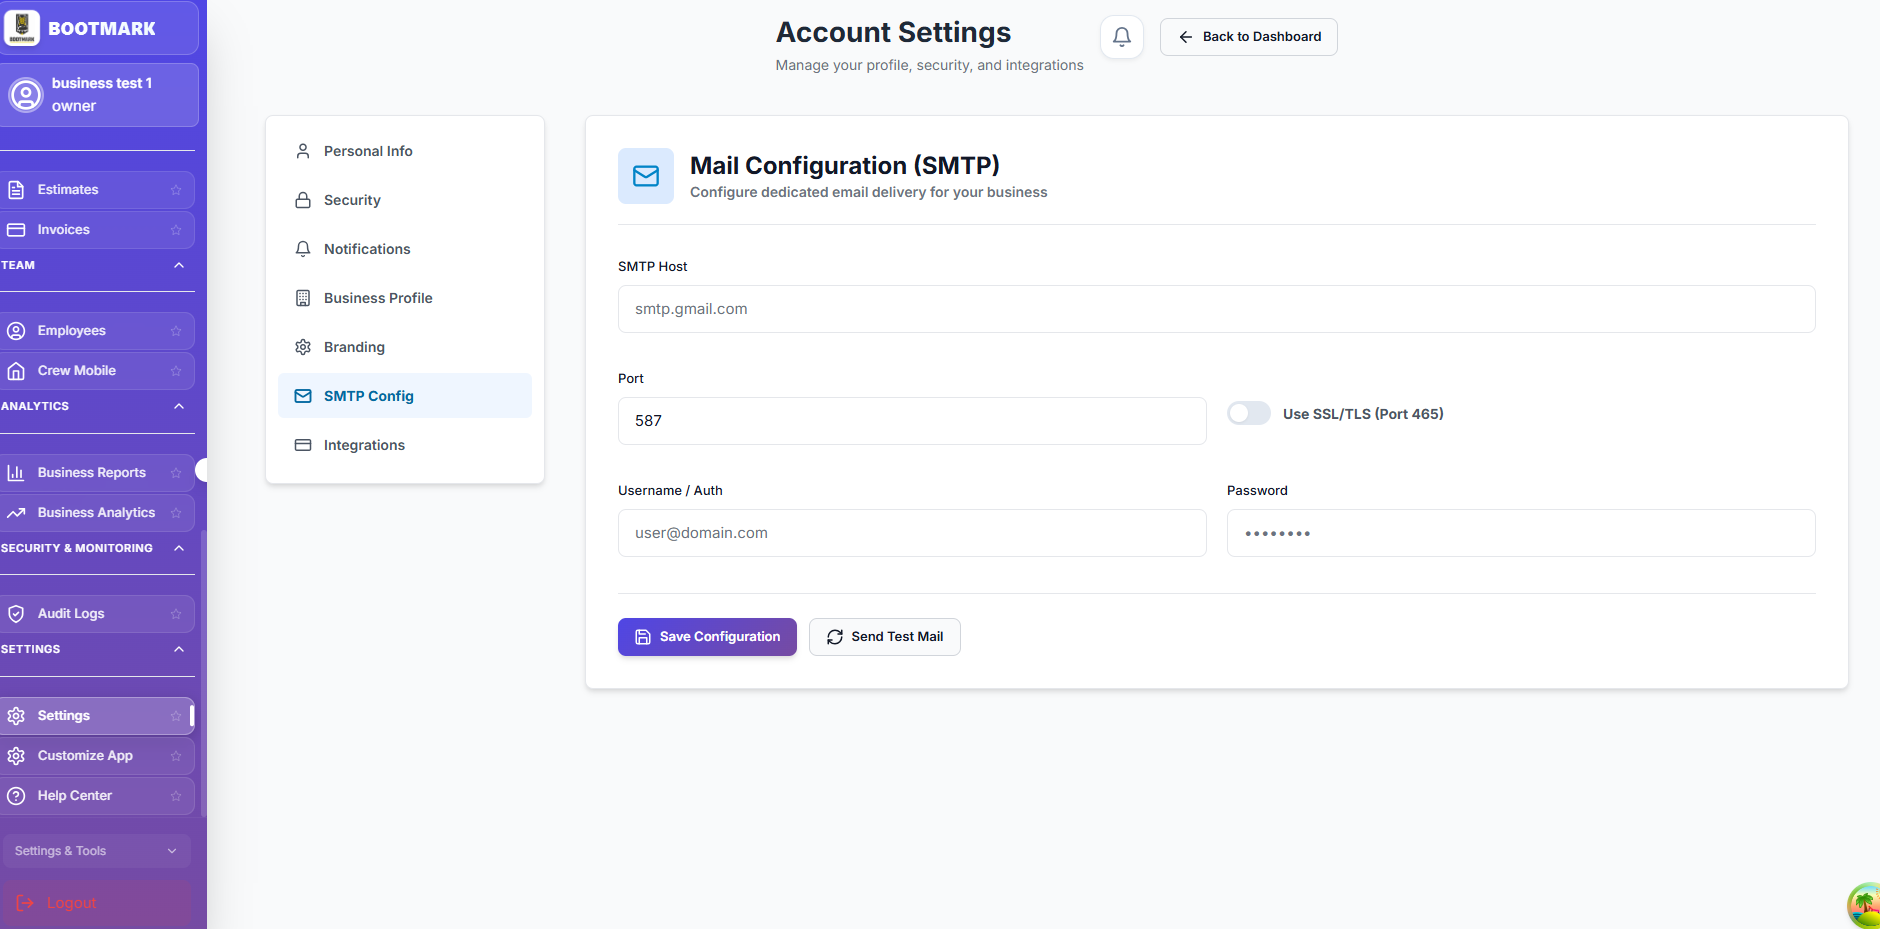
White-label the app in App Customization with your logo, colors, theme, currency, and tax, and turn feature areas on or off. Invite employees and crew from the Employees page (logins and temporary passwords are emailed), assign roles, and grant area-by-area permissions. You can also send mail from your own address by configuring SMTP.

3

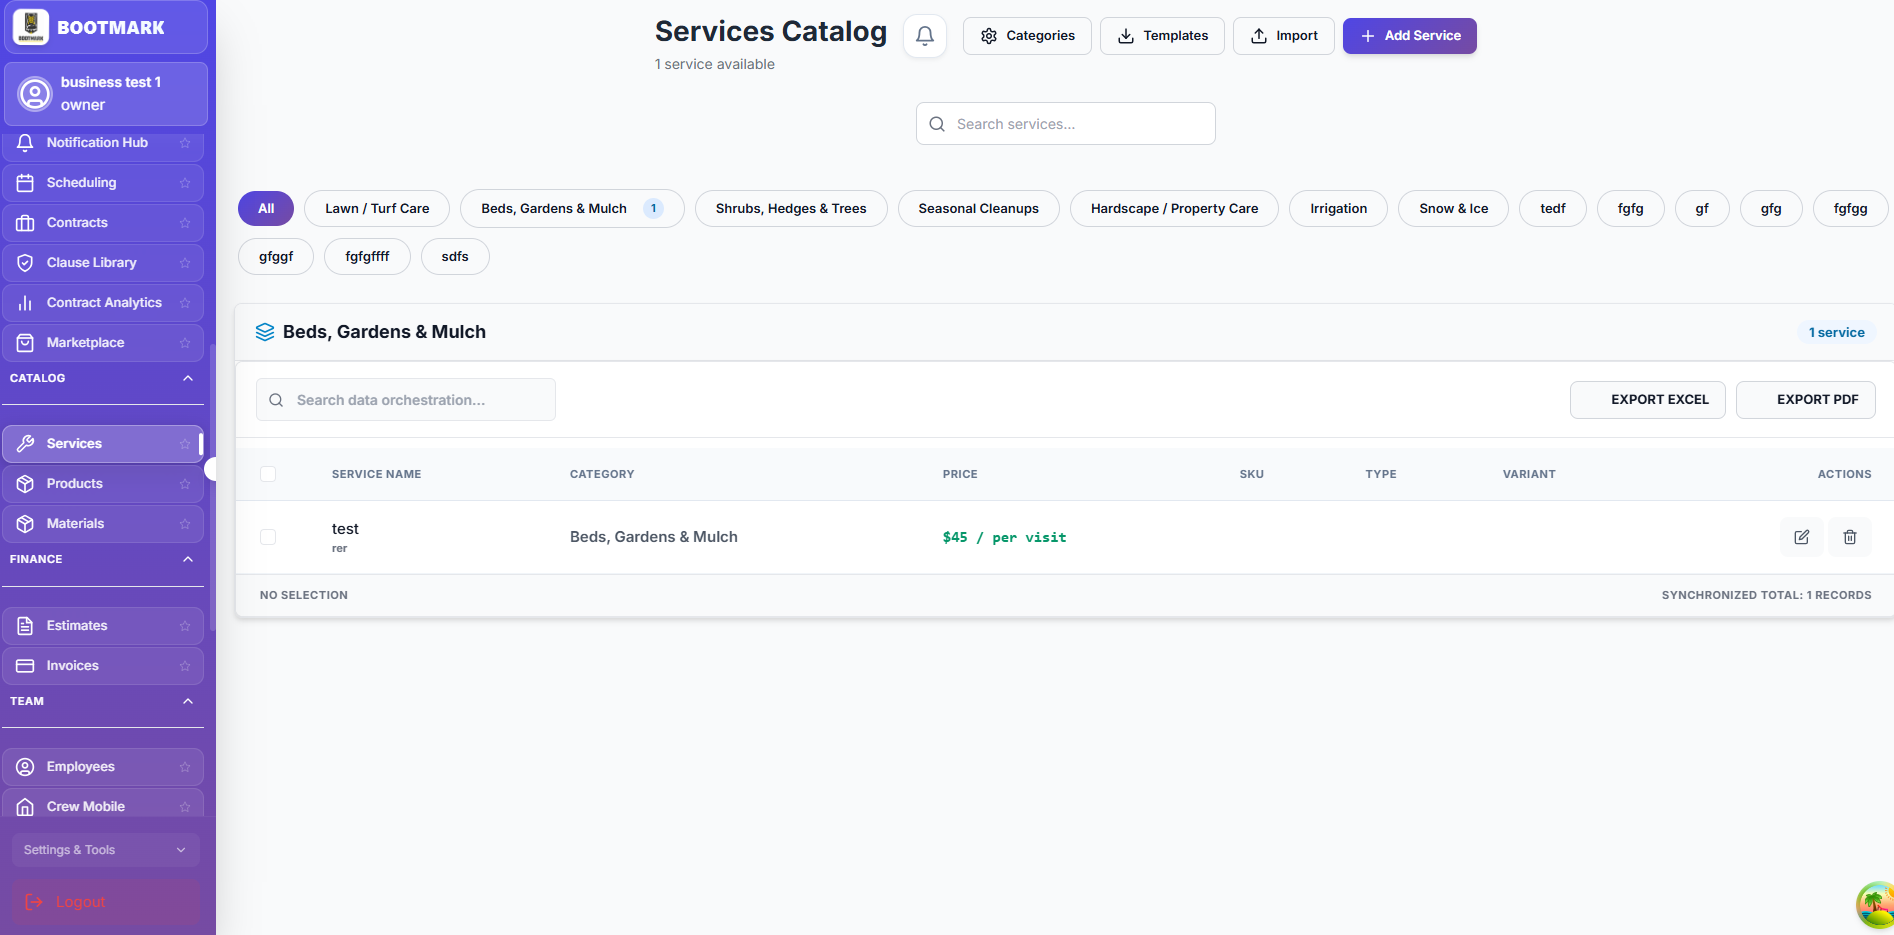
Build your catalog and inventory

Set up your Service Catalog (your price list and the public booking menu), marking each service Public or Private. Stock Materials and Products with prices and low-stock alerts, record Locations & Fleet (warehouses, vans, trucks), move stock with Stock Transfers, track tools with Equipment Checkout, and restock through Purchase Orders that top up inventory when received.

4

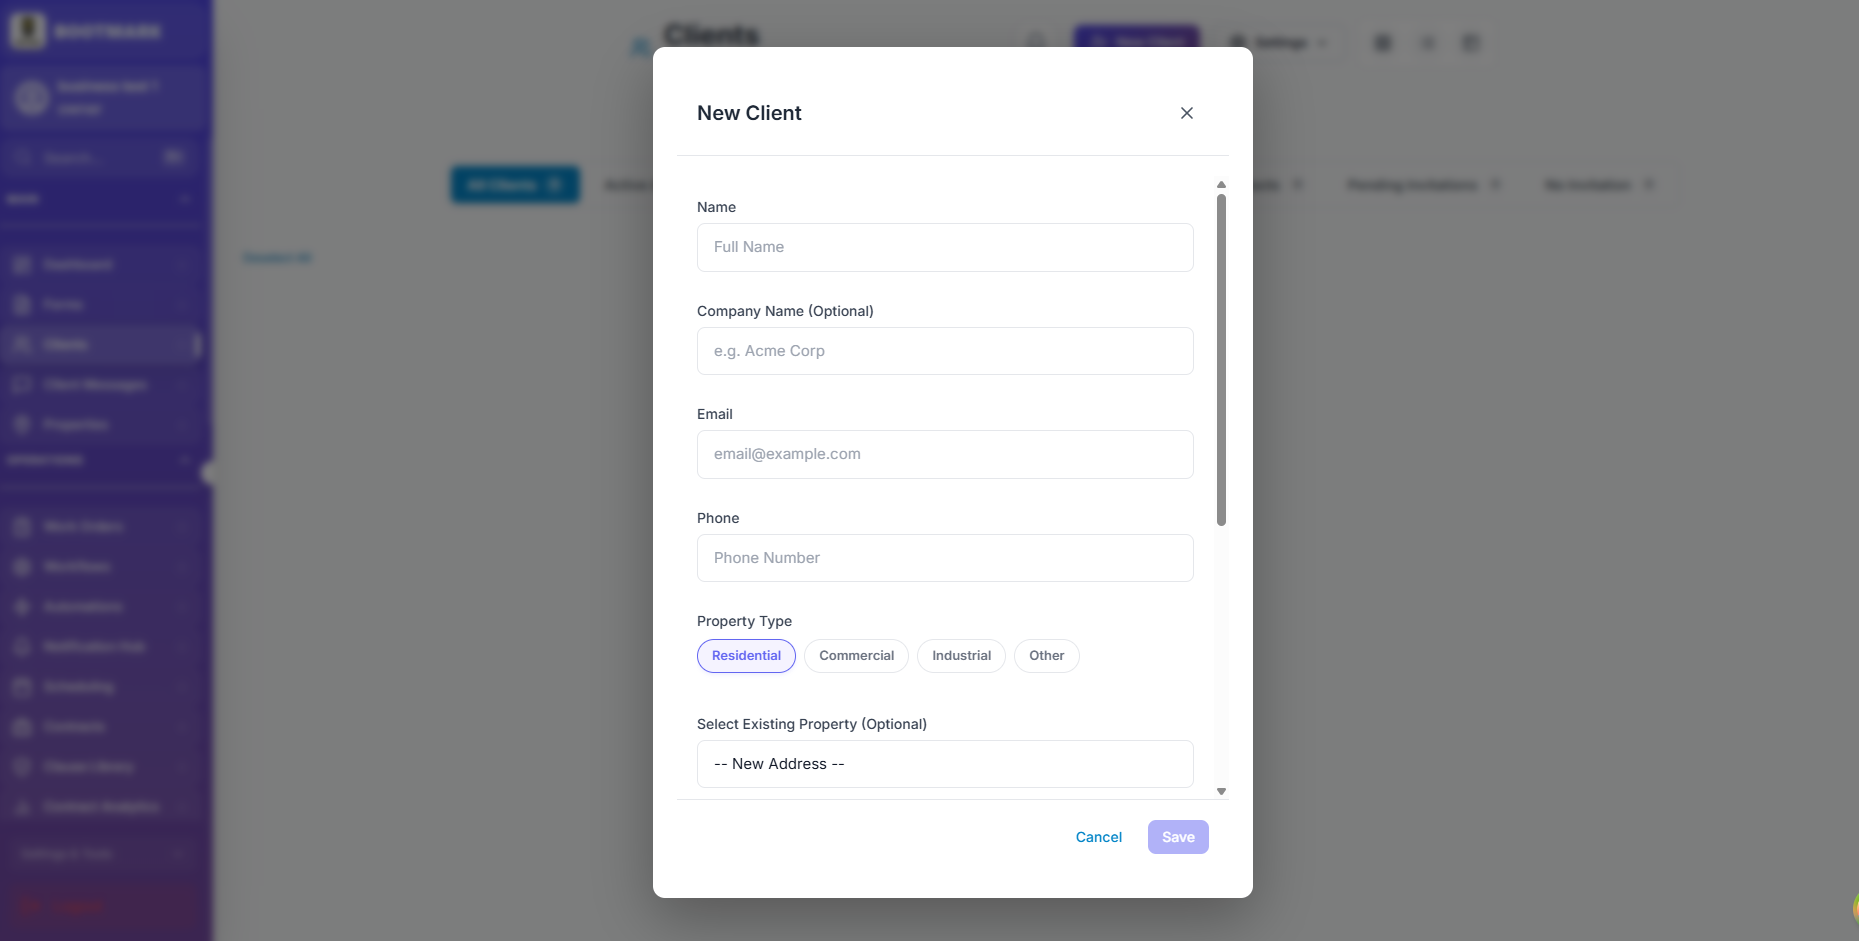
Capture and convert work

Leads arrive from your Connect listing, your booking page, client service requests, or are added directly to the Leads/CRM pipeline. Move a prospect from New to Won, convert a won lead into a client and an estimate, then turn an accepted estimate into an invoice, a work order, or a contract in one click.

5

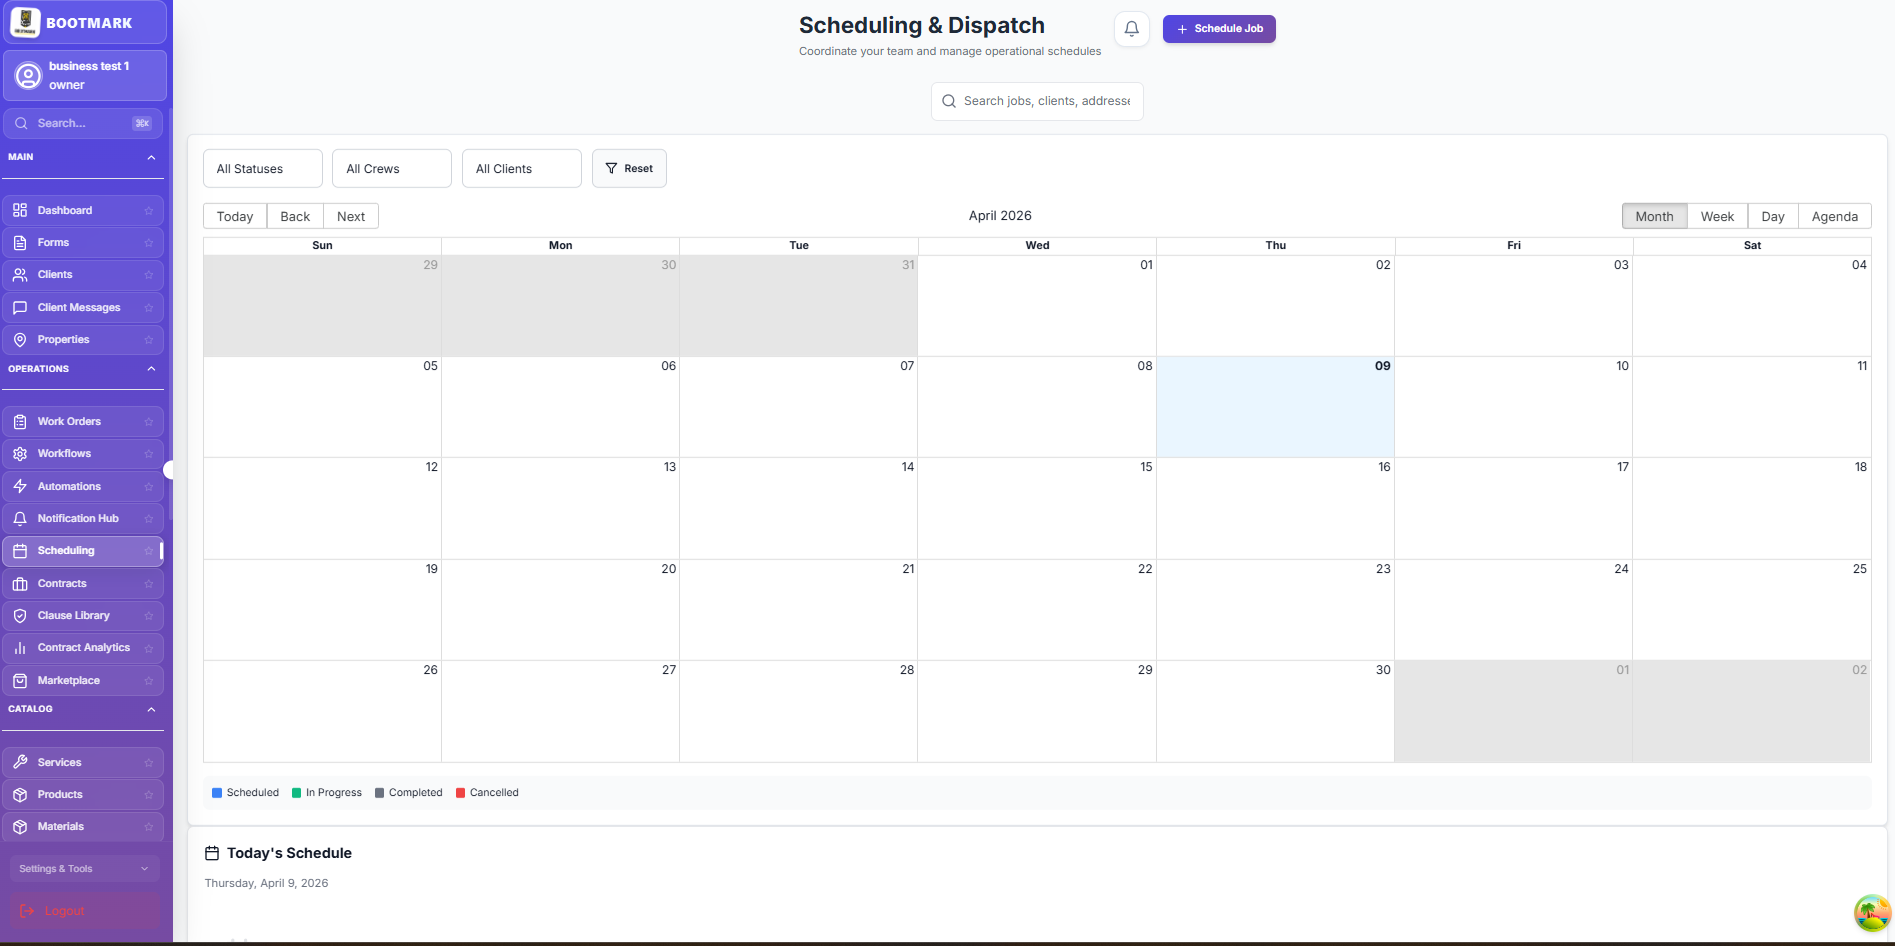
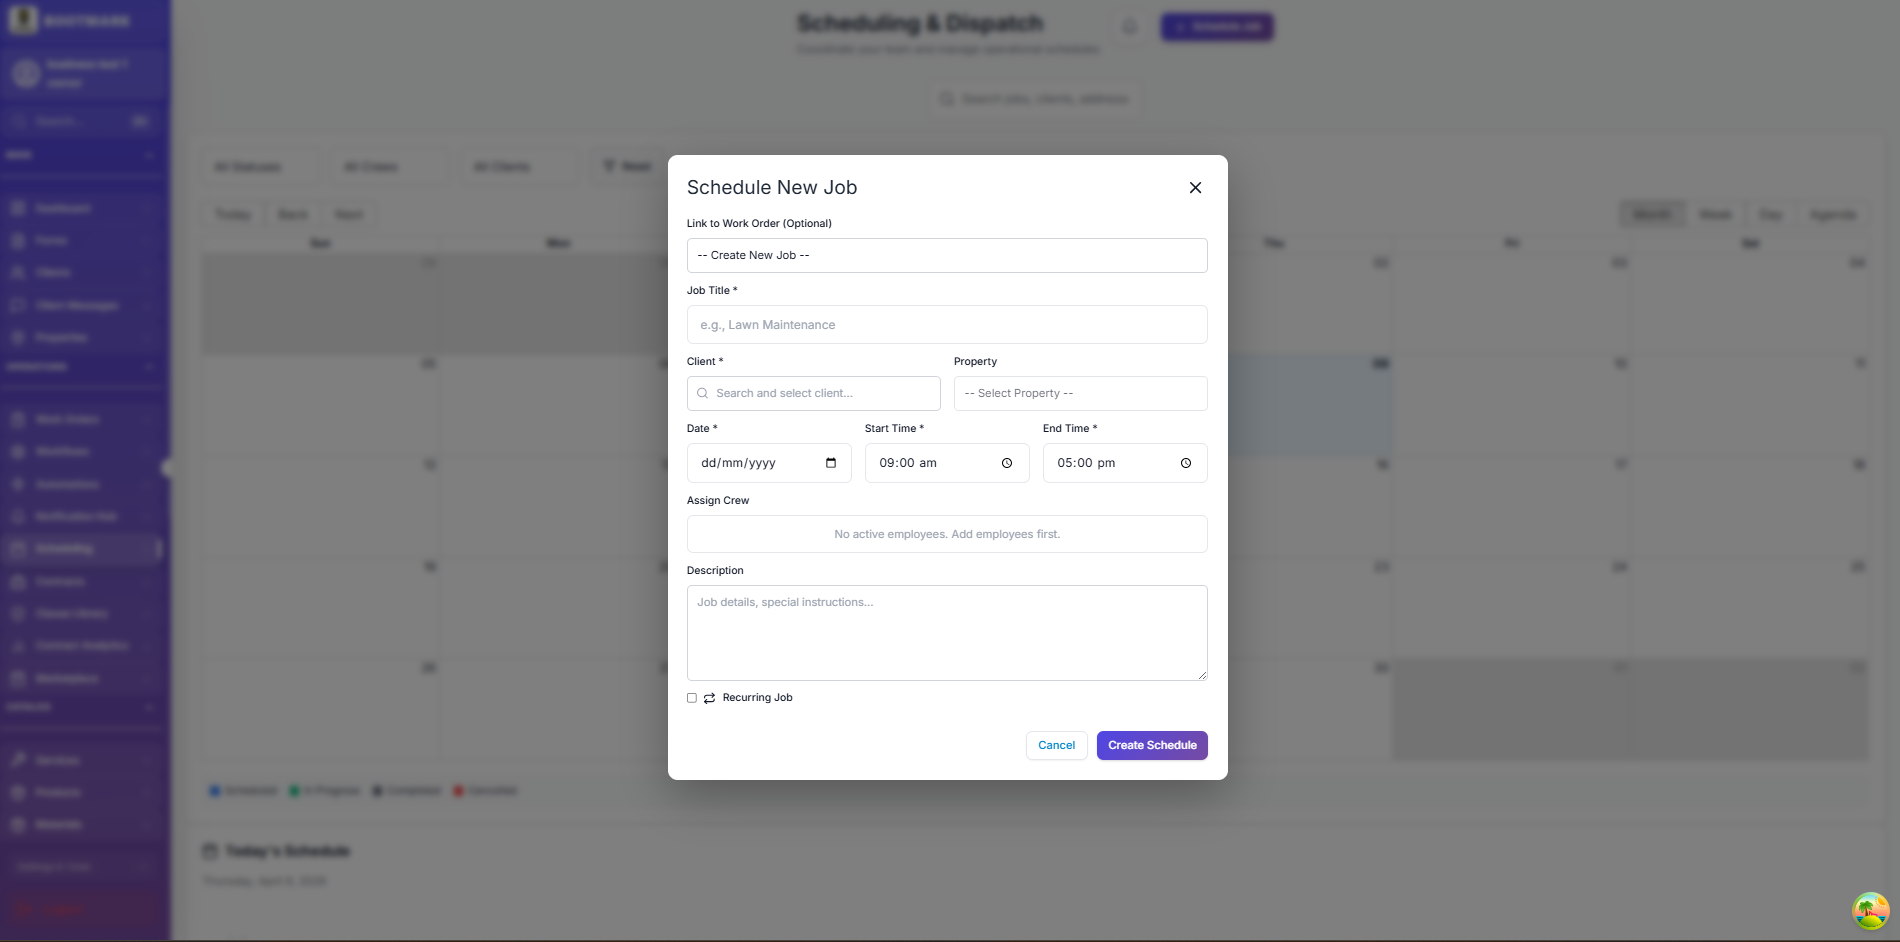
Schedule, dispatch, and do the work

Create work orders (the job ticket) with client, property, services, materials, price, and crew. On the drag-and-drop Scheduling calendar you place jobs, reassign by dragging between crew columns, and run Optimize Route to reorder a crew's stops by shortest distance. Crews use Crew Mobile to see jobs, clock in/out, and broadcast live GPS to your Dispatch Board.

6

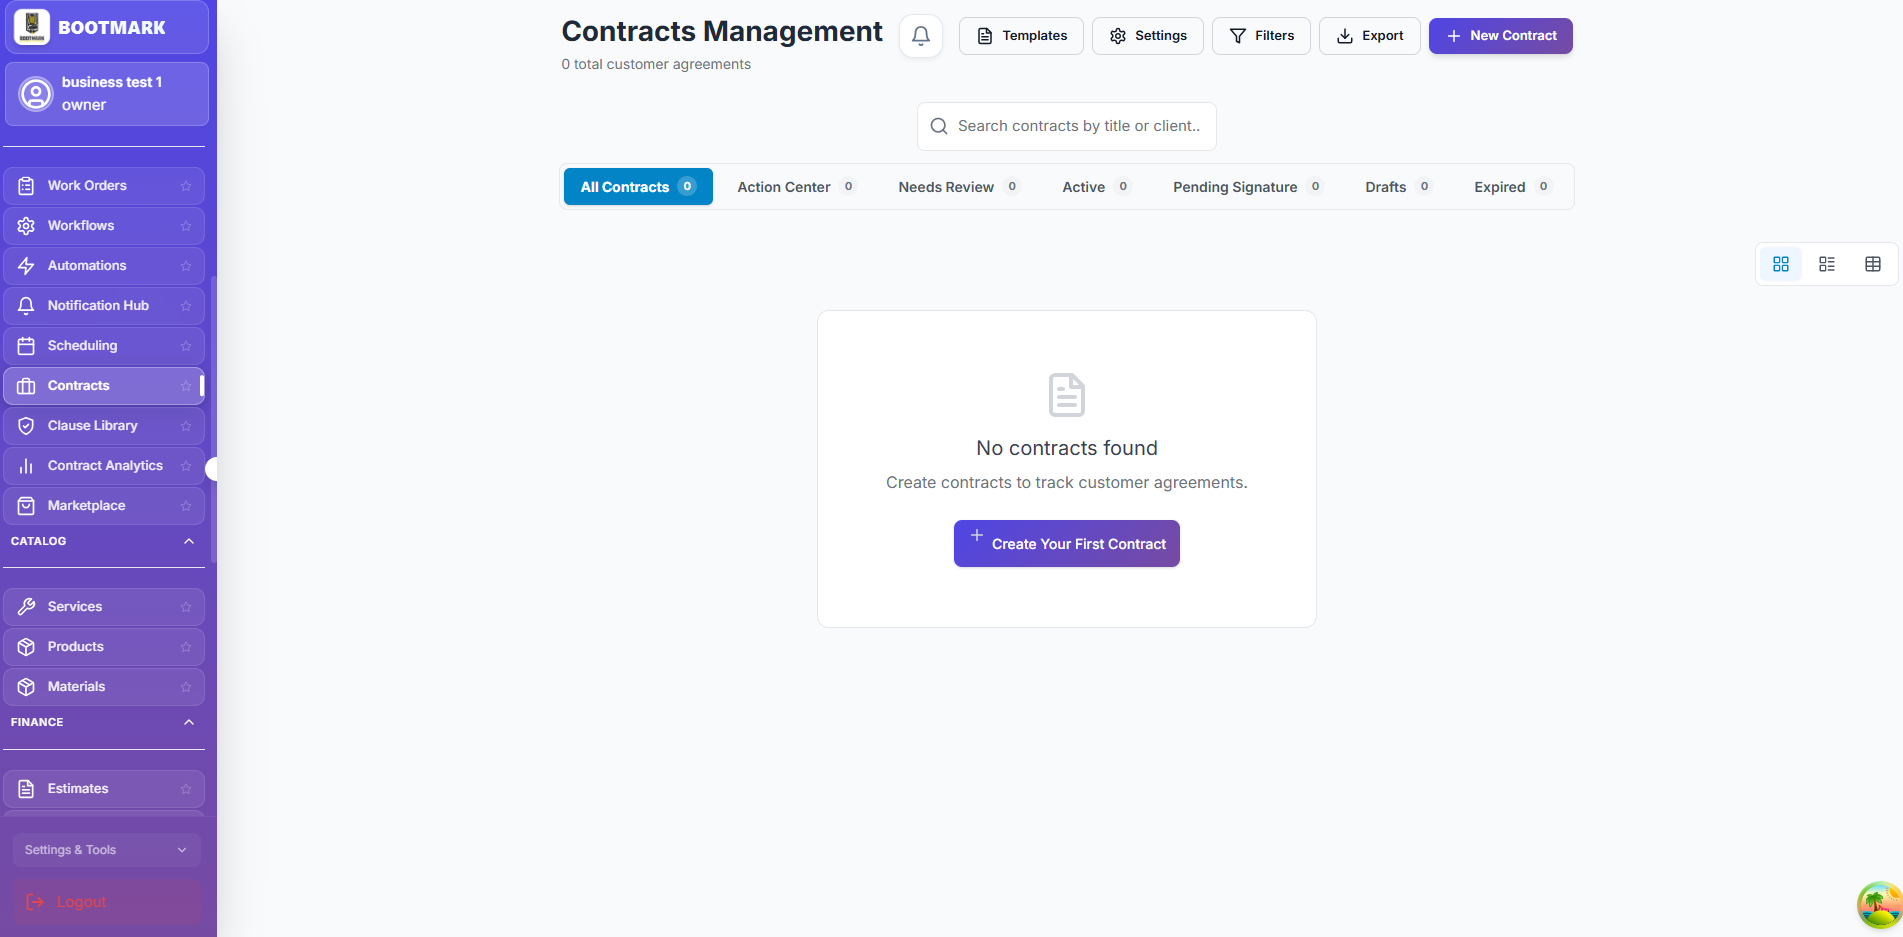
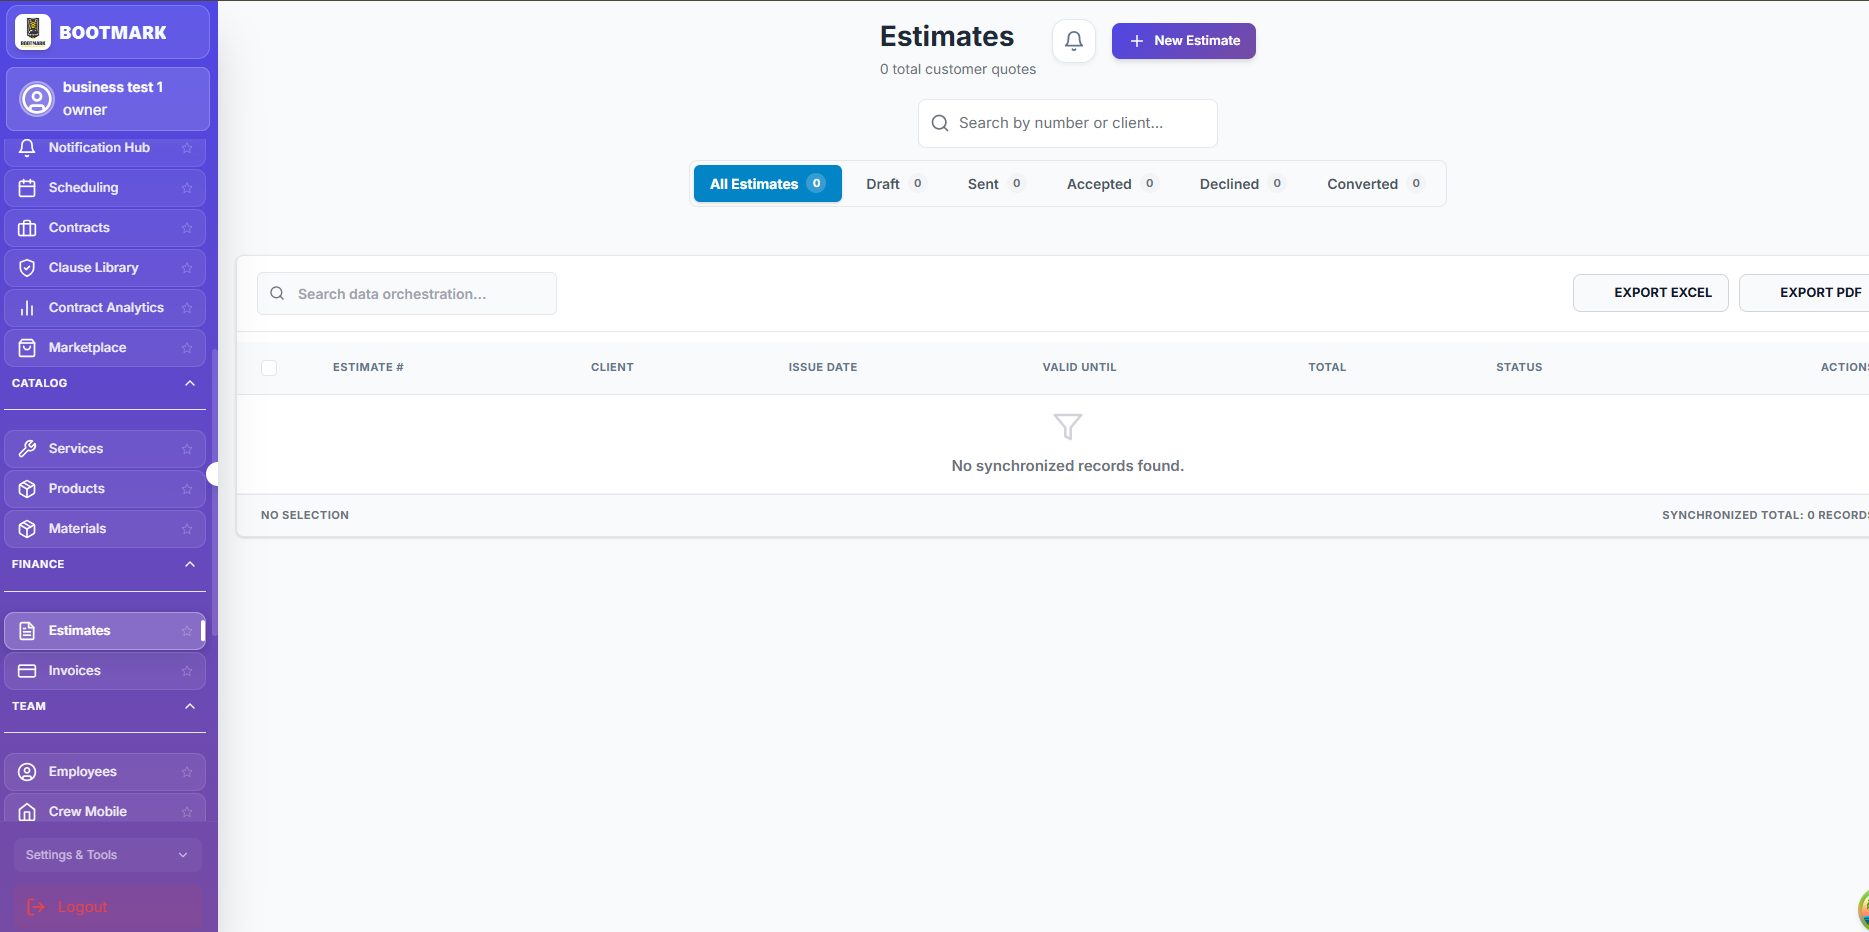
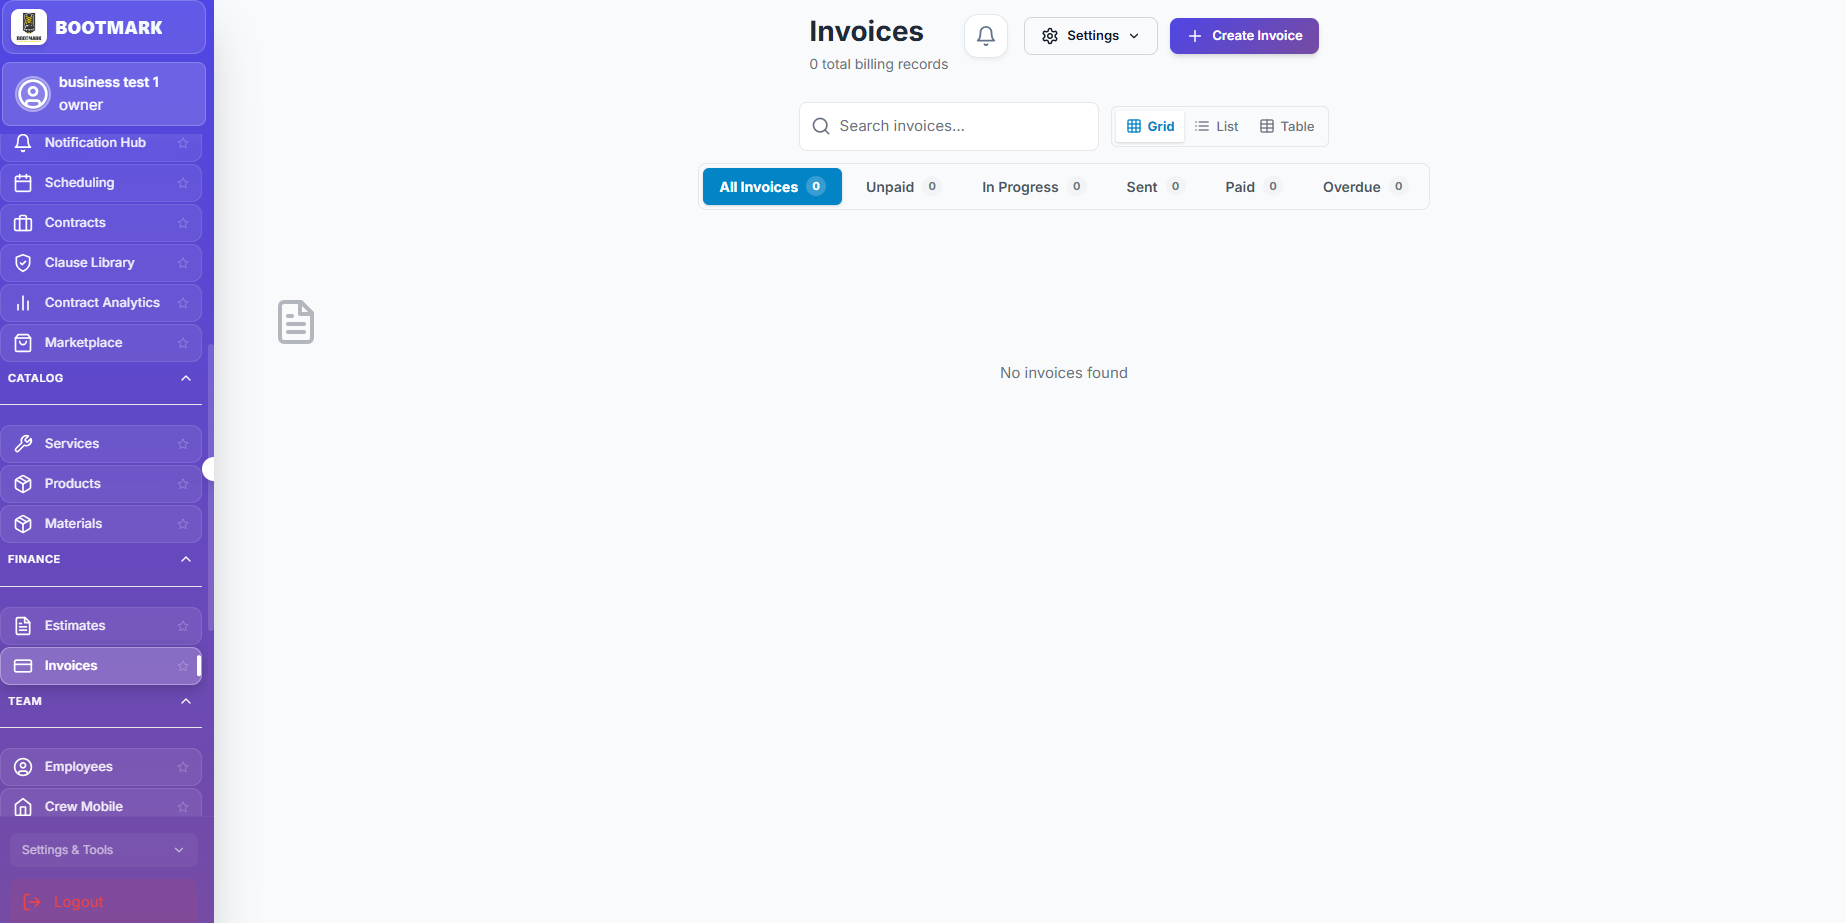
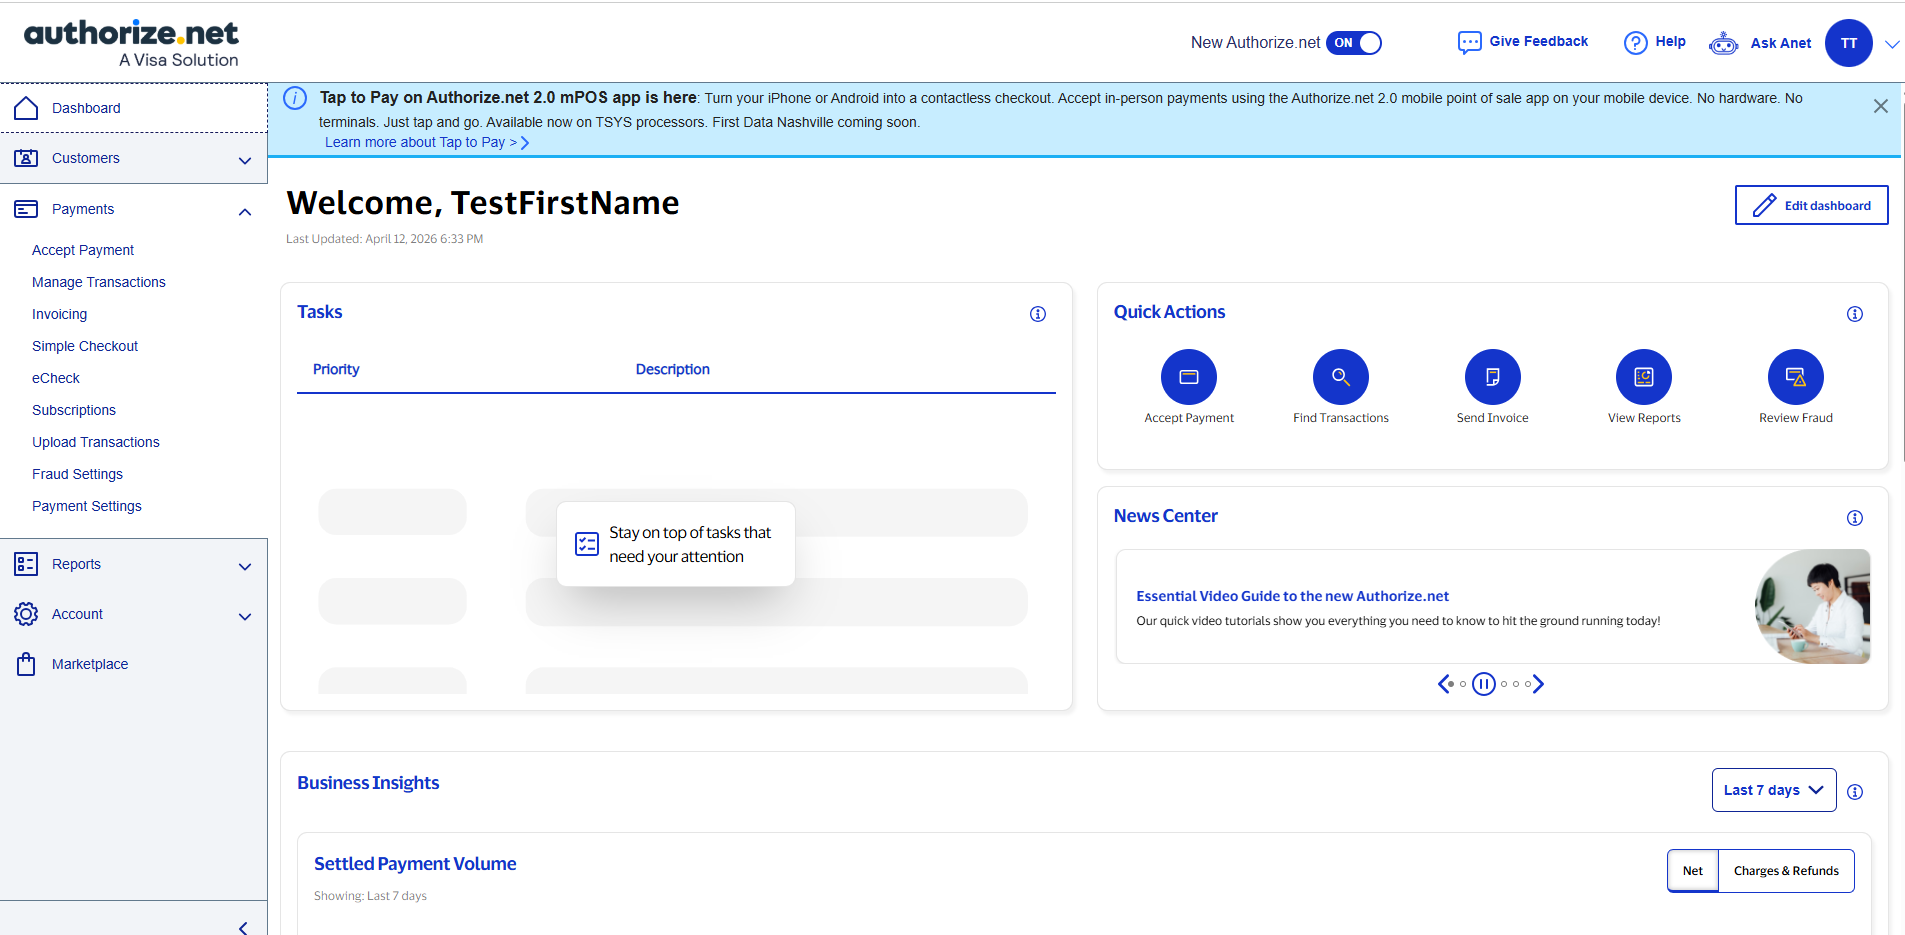
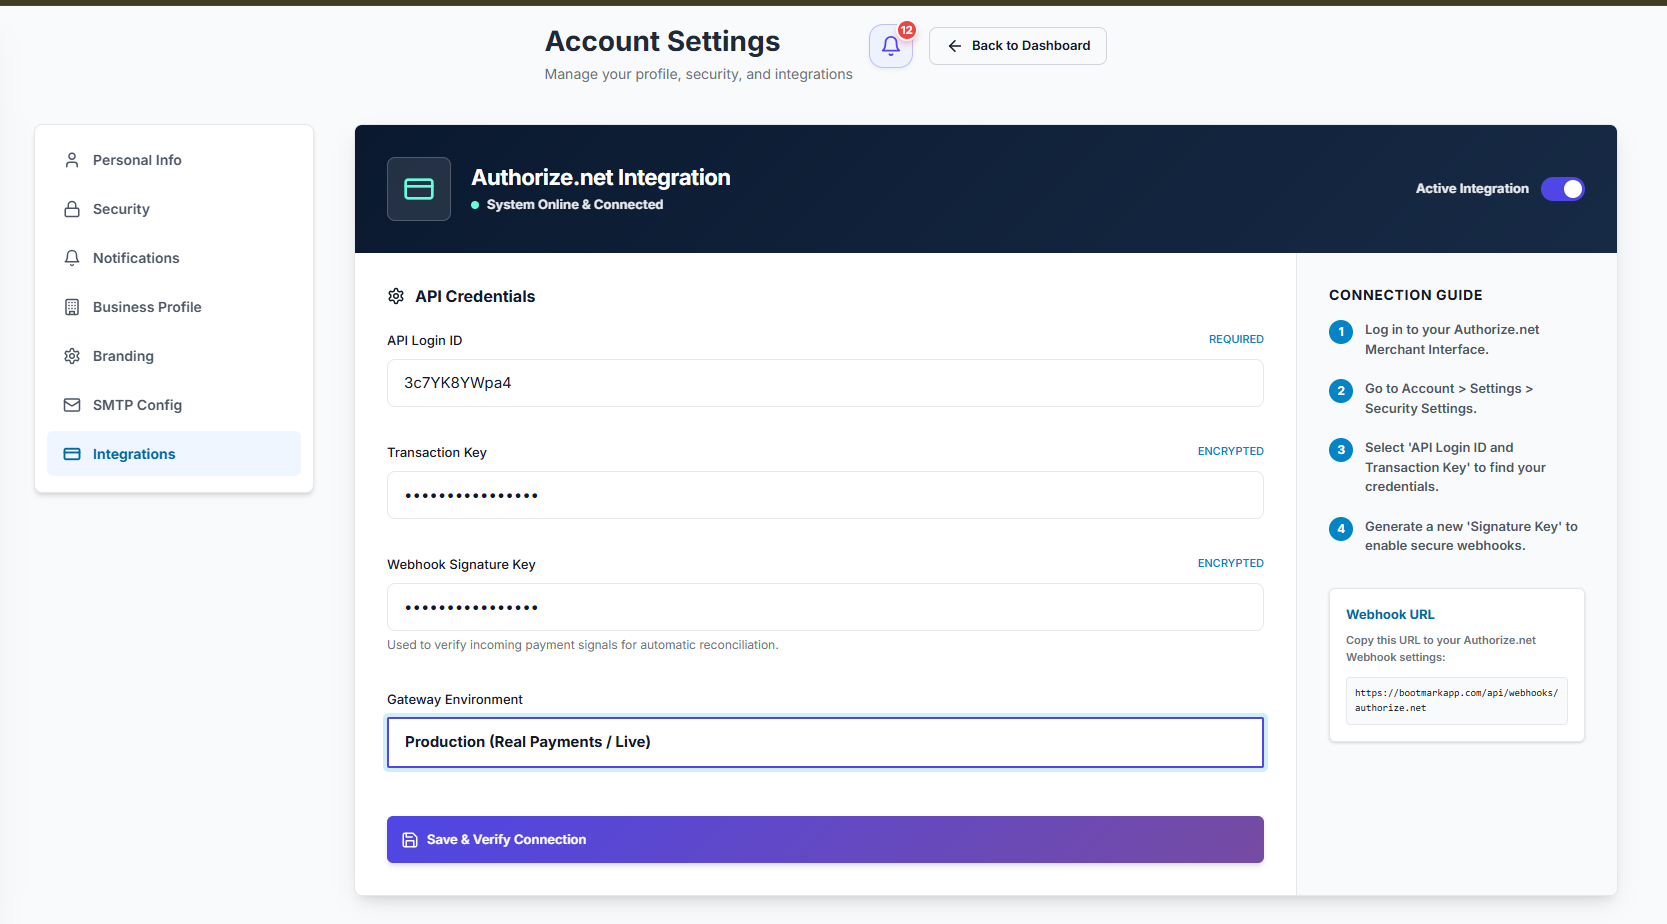
Bill, collect, and follow up

Generate an invoice manually, from a completed work order (materials and labor pre-filled), or from an estimate. Email it with a secure online payment link; record cash, check, or partial payments; and the invoice flips to Paid automatically once a card payment clears through Authorize.net. Push customers and invoices to QuickBooks, and create invoices from signed contracts.

7

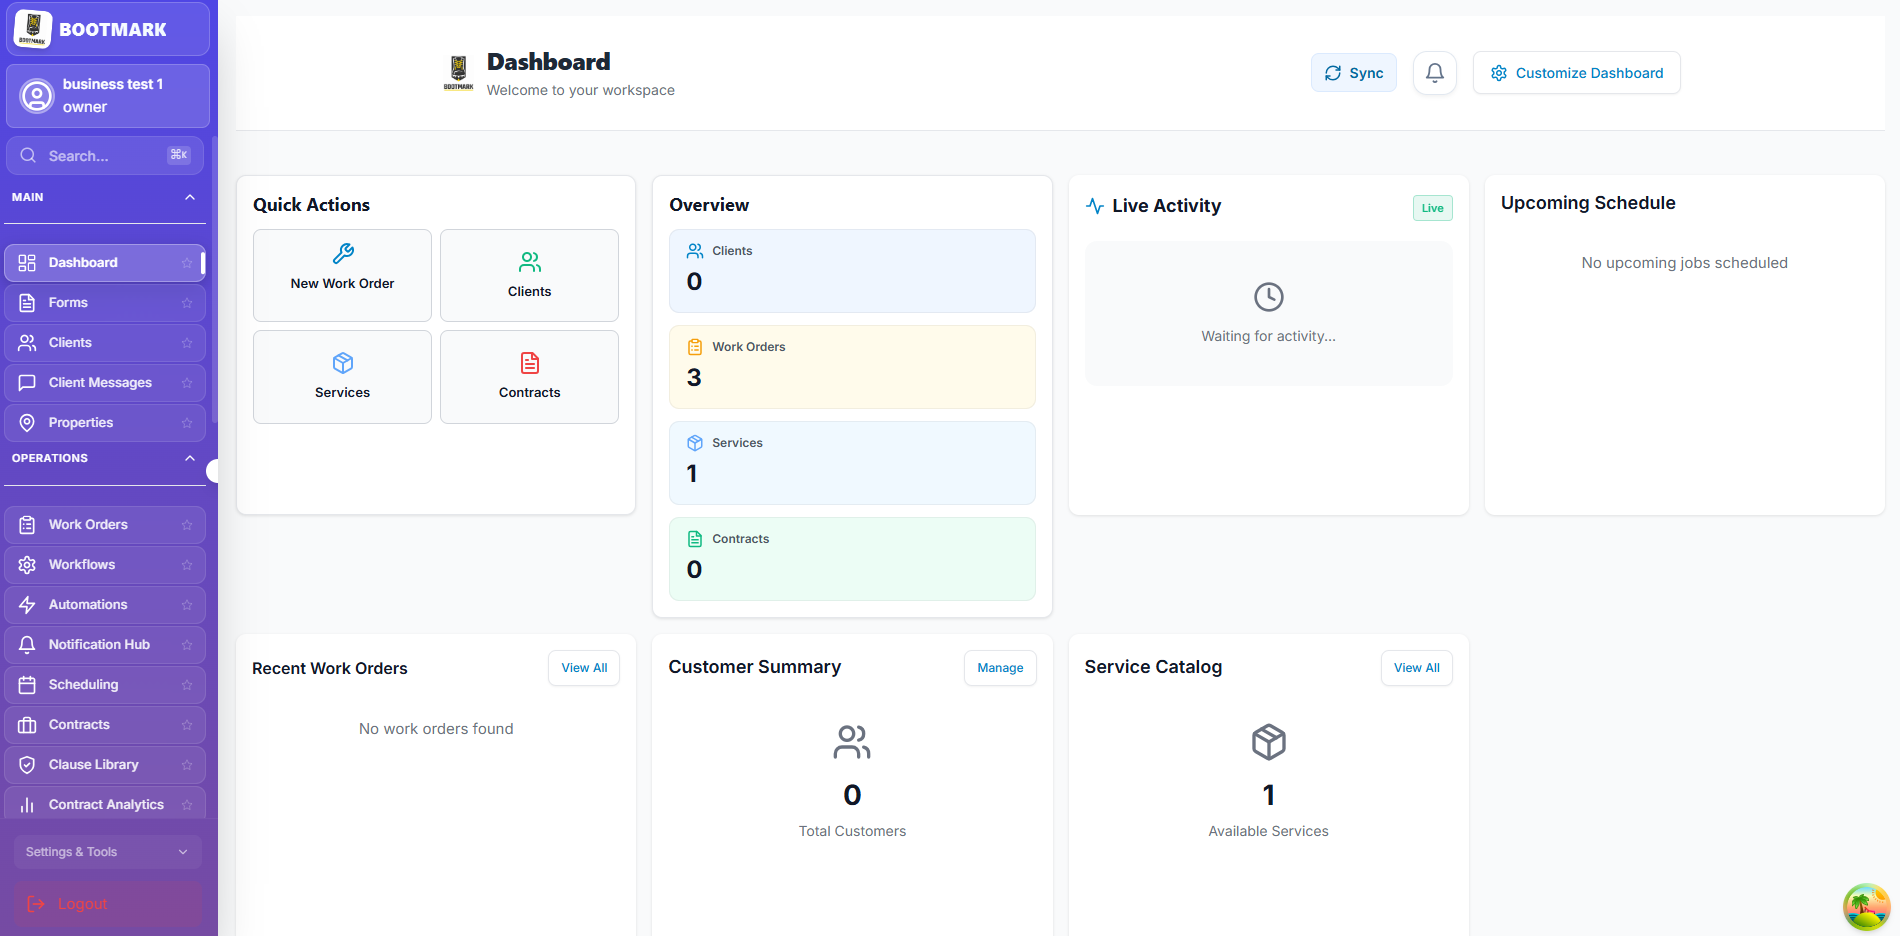
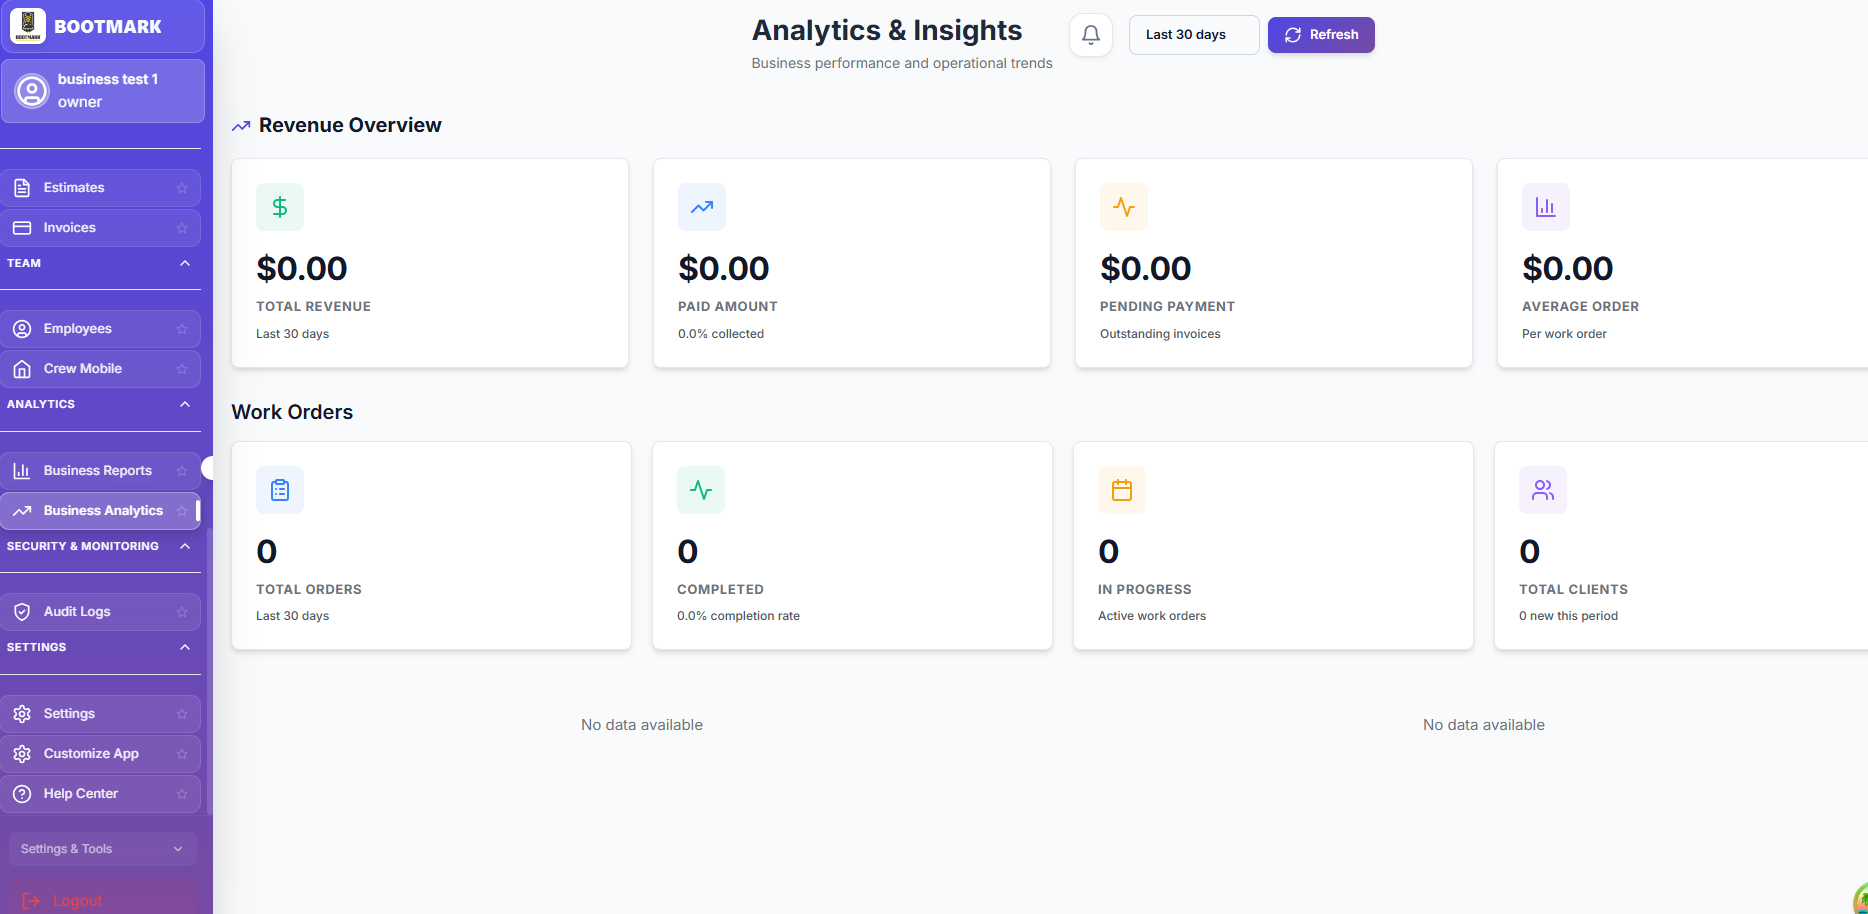
Measure, automate, and improve

Watch Business Reports and Analytics (revenue, job profitability, invoice aging, service mix, employee performance), track satisfaction on the CSAT & Ratings dashboard, and review Audit History. Build no-code Automations and custom Job Workflows, and install ready-made templates from the in-app marketplace.

Browse by topic

Step-by-step guides

Getting Started

Dashboard Overview

1

Navigation Menu

Access all core modules from the sidebar (Clients, Work Orders, etc.).

2

Analytics Cards

View your real-time performance, revenue, and pending tasks at a glance.

3

Quick Actions

Create new jobs or clients instantly from the dashboard shortcuts.

Dashboard Overview — BOOTMARK screenshot

Managing Forms & Templates

1

Form Library

View and manage all your custom forms and document templates.

2

Create New Form

Use the builder to create blank forms or start from a Smart PDF.

3

Browse Templates

Use our pre-built industry templates to get started faster.

Managing Forms & Templates — BOOTMARK screenshot

Services Catalog

1

Add New Service

Define your service name, category, and pricing structure.

2

Template Library

Import standard industry services to populate your catalog quickly.

3

Excel Export

Export your entire catalog to Excel for external reporting or auditing.

Services Catalog — BOOTMARK screenshot

Client Management

Adding Your First Client

1

Open Clients Tab

Select "Clients" from the main sidebar navigation.

2

Click Add Client

Hit the "Add Client" button in the top right corner.

3

Fill Information

Enter the contact details, company name, and assign a property type.

Adding Your First Client — BOOTMARK screenshot

Client Communications

1

Access Inbox

Navigate to "Client Messages" to view all incoming inquiries.

2

Real-time Chat

Reply to clients instantly and keep a full history of all communications.

3

Message Filtering

Search for specific clients or messages to find information quickly.

Client Communications — BOOTMARK screenshot

Operations & Work Orders

Contracts & Agreements

1

New Contract

Create legally binding agreements for your service projects.

2

Action center

Track contracts that need review, signature, or are about to expire.

3

Templates

Access pre-built contract templates to save time on every new job.

Contracts & Agreements — BOOTMARK screenshot

Scheduling & Dispatch

1

Calendar View

Monitor your entire team's schedule in a daily, weekly, or monthly calendar.

2

Crew Assignment

Assign specific crews or employees to jobs based on their availability.

3

Status Management

Track job completion in real-time with color-coded status indicators.

Scheduling & Dispatch — BOOTMARK screenshot

How to Schedule a Job

1

Click Schedule

Hit the "Schedule Job" button from the main calendar view.

2

Job Details

Link the schedule to a work order, select a client, and set the time.

3

Recurring Jobs

Easily set up recurring schedules for long-term service contracts.

How to Schedule a Job — BOOTMARK screenshot

Analytics & Insights

1

Revenue Overview

Track your total revenue, paid amounts, and pending payments.

2

Work Order Trends

Analyze your job volume, completion rates, and client growth.

3

Custom Reports

Generate detailed business reports to identify operational bottlenecks.

Analytics & Insights — BOOTMARK screenshot

Billing & Financials

Estimates & Quotes

1

Create Estimate

Provide professional quotes to your potential customers quickly.

2

Status Tracking

Monitor estimates from Draft and Sent to Accepted or Converted.

3

Bulk Export

Export your quotes directly to PDF or Excel for client review.

Estimates & Quotes — BOOTMARK screenshot

Invoicing & Payments

1

Manage Billing

View Unpaid, In Progress, and Overdue invoices in a unified dashboard.

2

Unified Search

Search for invoices by number, client, or status across your entire record.

3

Payment Recording

Mark invoices as Paid once you receive customer payments.

Invoicing & Payments — BOOTMARK screenshot

Setting up Authorize.net

1

Visit Website

Go to authorize.net and click "Get Started" to create your merchant account.

2

Verification

Complete the application and wait for account activation email.

3

Login to Portal

Once active, log in to the Authorize.net Merchant Interface.

Setting up Authorize.net — BOOTMARK screenshot

Generating API Credentials

1

API Login ID

Go to Account > Security Settings > API Login ID and Transaction Key.

2

Public Client Key

Navigate to Security Settings > Manage Public Client Key for the payment iframe.

3

Signature Key

Go to Security Settings > API Services > Signature Key for secure Webhook sync.

Generating API Credentials — BOOTMARK screenshot

Connecting to BOOTMARK

1

Open Settings

In BOOTMARK, navigate to Account Settings > Payment Settings.

2

Pasting Keys

Carefully paste your Login ID, Transaction Key, Client Key, and Signature Key.

3

Webhook Setup

Add your unique webhook URL to your Authorize.net portal for real-time status updates.

Connecting to BOOTMARK — BOOTMARK screenshot

Account & Customization

Email Configuration (SMTP)

1

Dedicated Delivery

Configure your own SMTP server (like Gmail or Outlook) for professional email delivery.

2

Auth Setup

Securely enter your mail server host, port, and authentication credentials.

3

Test Mail

Send a test email instantly to verify your connection is working correctly.

Email Configuration (SMTP) — BOOTMARK screenshot
FAQ

Frequently asked questions

Quick answers to the most common questions. Can't find yours? Contact support below.

Getting Started

Create an account with email and password or Google, then complete the two-step registration: your business name, type, currency, and address, then pick at least one service category. After you submit, your application goes into review. Once a BOOTMARK admin approves it, your business becomes active, you are placed on the Free plan automatically, and you get an approval email.

Getting Started

Every new business starts in a pending-review state and must be approved by a BOOTMARK admin before the workspace becomes fully active. Watch for the approval email; once approved you can log in to your full workspace.

Team & Permissions

On the Employees page, click Add Employee and invite an existing user or create a new login (a temporary password and link are emailed). Assign a role (administrator, manager, supervisor, member, crew, or staff) and toggle area-by-area permissions covering customers, work orders, invoices, scheduling, reports, team, and field operations. Removing someone cuts off their access, including active sessions.

Customization

Open App Customization (owner/admin rights or the business customization permission). Upload your logo and favicon, choose brand colors with a live preview, pick a light, dark, or system theme, and set currency and tax. Save Configuration applies it across your workspace. You can also configure your own email-sending so messages come from your domain.

Clients & Portal

On the Clients page click New Client and enter the name (required) plus optional company, email, phone, property type, address, and notes; entering an address also creates a property record automatically. To bring over your whole list, use Import to upload a CSV — the system maps common columns, creates each client, and tells you how many were created and which rows failed.

Clients & Portal

Make sure the client has an email on file, then click Send Invitation on the Clients list or their profile. They get a branded email with a unique link that expires in 7 days, accept it, set a password (or sign in with a matching Google account), and land on their dashboard. The button later shows Resend Invitation, which issues a fresh link.

Clients & Portal

Signed-in clients see a dashboard with balances and activity, view and download invoices (and pay online if you have enabled payments), review and e-sign contracts, accept or decline estimates, browse your published services, submit and track service requests, update their contact details, upload documents, and message you in real time. They only see their own records.

Clients & Portal

When a client submits a request from the portal (service type, description, preferred date, priority), it is saved to that client and you get an instant notification. You will find it on the client profile under Service Requests, where you can update status, add a customer-visible reply, and click Create Work Order to turn it into a scheduled job.

Clients & Portal

It is a real-time, two-way chat. On the business side, Client Communications groups all conversations by client with search; you can also chat from a client profile. Clients chat back from the Messages area of their portal, and new client messages trigger a notification for you. Conversations are private to your business and that client.

Work Orders & Scheduling

You create a work order (it starts as a draft or your workflow's first stage), schedule it and assign crew (status becomes scheduled). In the field the crew taps On the Way, then Clock In (in progress), then Clock Out (completed). The system stamps start and end times, deducts materials from inventory, refreshes the job cost, and can fire automations at each status change.

Work Orders & Scheduling

No. Crew Mobile only lists jobs assigned to that person, and the system enforces that a crew member can only change the status of work orders they are assigned to. Attempts to update someone else's job are rejected.

Work Orders & Scheduling

On the Scheduling calendar, turn on Crew View to get one column per crew member, then drag a job from one column to another to reassign it; changes save immediately. Optimize Route lets you pick one crew and a day, then reorders that crew's stops by shortest travel distance with a preview of distance and time saved. Nothing changes until you click Apply Optimization.

Work Orders & Scheduling

When the job status changes to On the Way, the customer can get an email (if work-order emails are enabled in Dispatch Settings) showing the technician's name, stops away, and an estimated arrival. In the portal's Track Your Crew page they see a live map, the service location, an estimated arrival time, distance, and a stops-away count, refreshing about every 30 seconds. The ETA is a straight-line estimate, not turn-by-turn routing.

Work Orders & Scheduling

Two ways. If crew clock in and out against the job, those hours are recorded and the job's labor cost is refreshed automatically on clock-out. If you don't use the time clock, you can type labor in manually — Hours times Rate or a flat amount. An admin can review, edit, and approve hours for payroll.

Estimates & Invoices

Open Estimates, click New Estimate, pick the client, and add line items from your catalog; set the issue date, valid-until date (defaults to about 30 days out), discount, tax, notes, and terms. Email it or download a PDF. Once the customer accepts it in their portal, click Convert to Invoice (or Work Order, or Contract). You can also generate an invoice directly from a completed work order.

Estimates & Invoices

When you send the invoice you can include a secure payment link, or use the Pay Now button. The client enters card details on a secure Authorize.net hosted form; card data is never stored in BOOTMARK. After the payment is verified and the amount matches the total, the invoice flips to Paid and a receipt is emailed. If the bank holds it for review it shows Pending Review, and amount mismatches are flagged.

Estimates & Invoices

Online card payments run through Authorize.net using their hosted secure form. Each business enables its own gateway in Account Settings under Integrations by entering its Authorize.net API Login ID and Transaction Key and choosing sandbox or production. Without valid credentials the payment page says the gateway is not configured. Payment links are single-use, expire after 30 days, and are disabled after repeated failures or once paid.

Estimates & Invoices

Yes. You can record a manual payment (cash, check, ACH) on an invoice with a specific amount, and partial payments are supported. The invoice shows the amount paid, the total, and the remaining balance, and the status moves to partially paid until fully covered. The system enforces valid status transitions, so you can't jump straight from draft to paid.

Contracts

Open the contract and choose Send Email, Generate Link (a secure, time-limited link), or Publish to Portal — which moves it to Pending Signature. To sign, the client reviews the details and terms, enters their name and email, draws a signature, and accepts four consent statements confirming they agree, intend to sign electronically, consent to transact electronically, and understand it is legally binding. Their IP and device info are recorded, and a signed copy is emailed.

Contracts

Yes. On the secure signing page there is a Negotiation & Feedback section where the client proposes a change with comments. This moves the contract into a negotiation state and alerts your team. You review the suggestion and either Accept & Apply or Reject with a reason. An optional AI risk analysis scores the change Low, Medium, or High; high-risk changes are flagged and one-click Accept is disabled as a safeguard.

Forms & Documents

A Blank Form is built from scratch with the drag-and-drop field palette, great for surveys, intake, and requests. A Smart PDF Form starts from a real document you upload (PDF, Word, or image up to 50 MB); the system renders its pages and detects fields, and every submission produces a filled-in copy of that exact document. Use a Smart PDF Form when the output needs to look like your official paperwork.

Forms & Documents

Open a form and click Submissions to see each entry field-by-field, newest first, with a Hot Lead badge where flagged. You can export everything to CSV or a formatted PDF report, delete entries, and load more as you scroll. For Smart PDF forms you can download each submission's filled PDF or select several and download them together as a single ZIP.

Catalog & Inventory

Each service in your catalog has a Public booking visibility toggle. When it is on, the service shows on your online booking page and Connect listing; when it is off, it stays internal for quotes and internal jobs. A service only appears to customers if it is both active and public, so unchecking that box hides it from booking right away.

Catalog & Inventory

Materials are the consumable supplies crews use on jobs (pipe, wire, paint, lumber) with a cost price, selling price, and a minimum stock level for low-stock alerts. Products are sellable stock items with a unit price and threshold. Both can be added to a Purchase Order, and when you mark that order Received the quantities are added back into inventory automatically. You can also move stock between locations with Stock Transfers.

Reports & Insights

Business Reports include Sales Summary, Work Orders, Client Activity, Inventory, Revenue Trends, Service Distribution, Employee Performance, Invoice Aging, and Job Profitability, each filterable by date range and exportable to Excel. Business Analytics gives Financials, Operations, and Clients dashboards. Certain sensitive financial reports require two-factor authentication to open.

Automation & Notifications

Automations are general when-this-happens-do-that rules across operations, finance, and CRM; they can send an email, post a notification, update a field, create a record, or call a webhook, with conditions, safe testing, and a log. Job Workflows define the custom stages a job moves through, and each stage can carry rules that fire when a job enters it. Automated work-order emails from both only send if you have enabled work-order emails in dispatch settings.

Connect & Plans

Connect is a public marketplace where customers search local providers by keyword, category, and location, view your profile, services, prices, and reviews, then submit a booking or quote request as a guest with just a name and an email or phone. They get a private magic-link tracking page (no login) and can leave a star rating after the work. To get listed, open the Connect listing setup, use one-click auto-setup, pass a short quality checklist, and publish.

Automation & Notifications

Only if you turn them on. Automated work-order emails and the on-the-way notification are off by default for new businesses. In Dispatch Settings you can enable them, set thresholds for stops away and ETA change, and customize the wording before any messages go out. The customer must also have an email on file. Emails for other events like invoices or estimates are not affected by that switch.

Connect & Plans

There are three tiers. Free covers limited monthly jobs, one crew member, one location, and basic analytics, and is assigned automatically to newly approved businesses. Professional raises the limits and adds features like custom branding and advanced analytics. Enterprise offers the highest limits plus extras like API access and white labeling. Hitting a plan limit blocks the action and prompts an upgrade, and your billing page shows your plan, live usage meters, and payment history.